One of the projects I'm currently working on is a "cat station". Each cat (two total) has their own little area in our house for their automatic dry food dispenser, a water fountain, and a place to put their wet food dish. At the moment, these sit on a large format tile (1'x2').
problems, so many problems
Even though we make fun of our male cat's intelligence (and his walnut sized brain), we have to give him credit for discovering how to hack the dry food dispenser. By leaning on it and rocking it back and forth, he is able to get more food to fall out, and this has made it difficult to tune his diet for a healthy weight.
The tile was an attempt to solve this problem - we velcroed the bottom of the feeder to the tile, with the idea that the added mass would prevent him from being able to rock the feeder. This kinda works, he has to put more effort into his attempts. However, the lack of stiffness in the system is really only a slight impediment for a cat with his motivation.
Another problem we have with the current system is its dependency on electricity. The water fountain has a pump, and when unpowered, the water sits in the sump and is inaccessible to the cats. The automated feeder does have battery backup in the form of C batteries, but some extra redundancy there would give us more peace of mind, if we were to be out of the house and the power went out.
solution
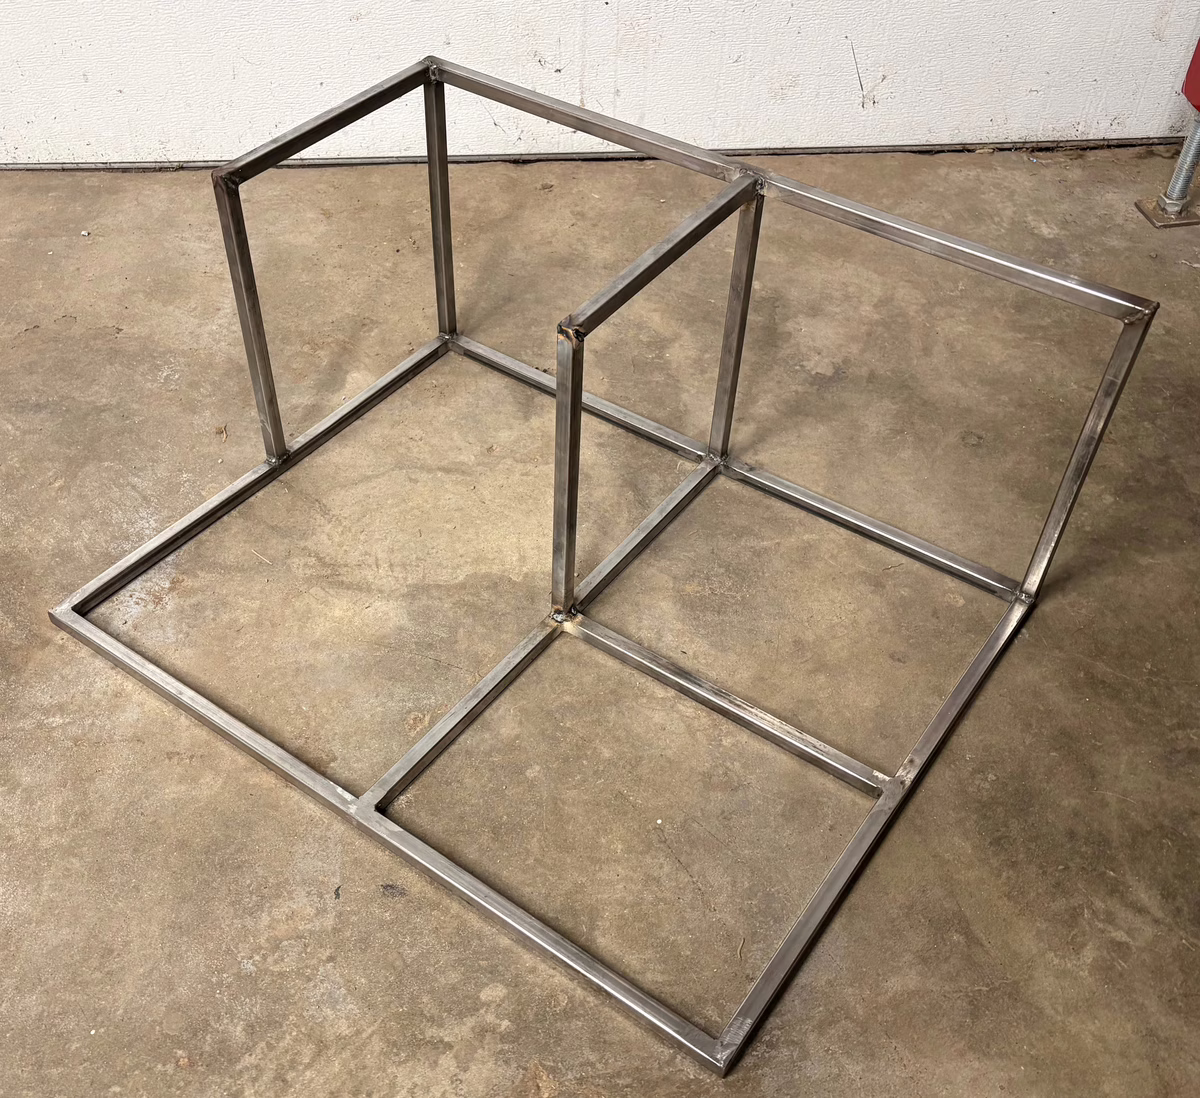
The cat station is the solution to both of these problems. It will have a backup battery to run the water pump and feeder, and also contain a mechanism to completely prevent any movement of the automated feeder (hopefully!). The frame will be constructed from 1/2" 16ga steel tubing, with plywood inlaid. There is a separate area for each of the automated feeder, fountain, and wet food bowl, with walls/a lip running around the edges to help control spills (sometimes they are messy eaters).
Here's what I have welded up so far:
Frame tacked. Does everything look square from where you're standing?
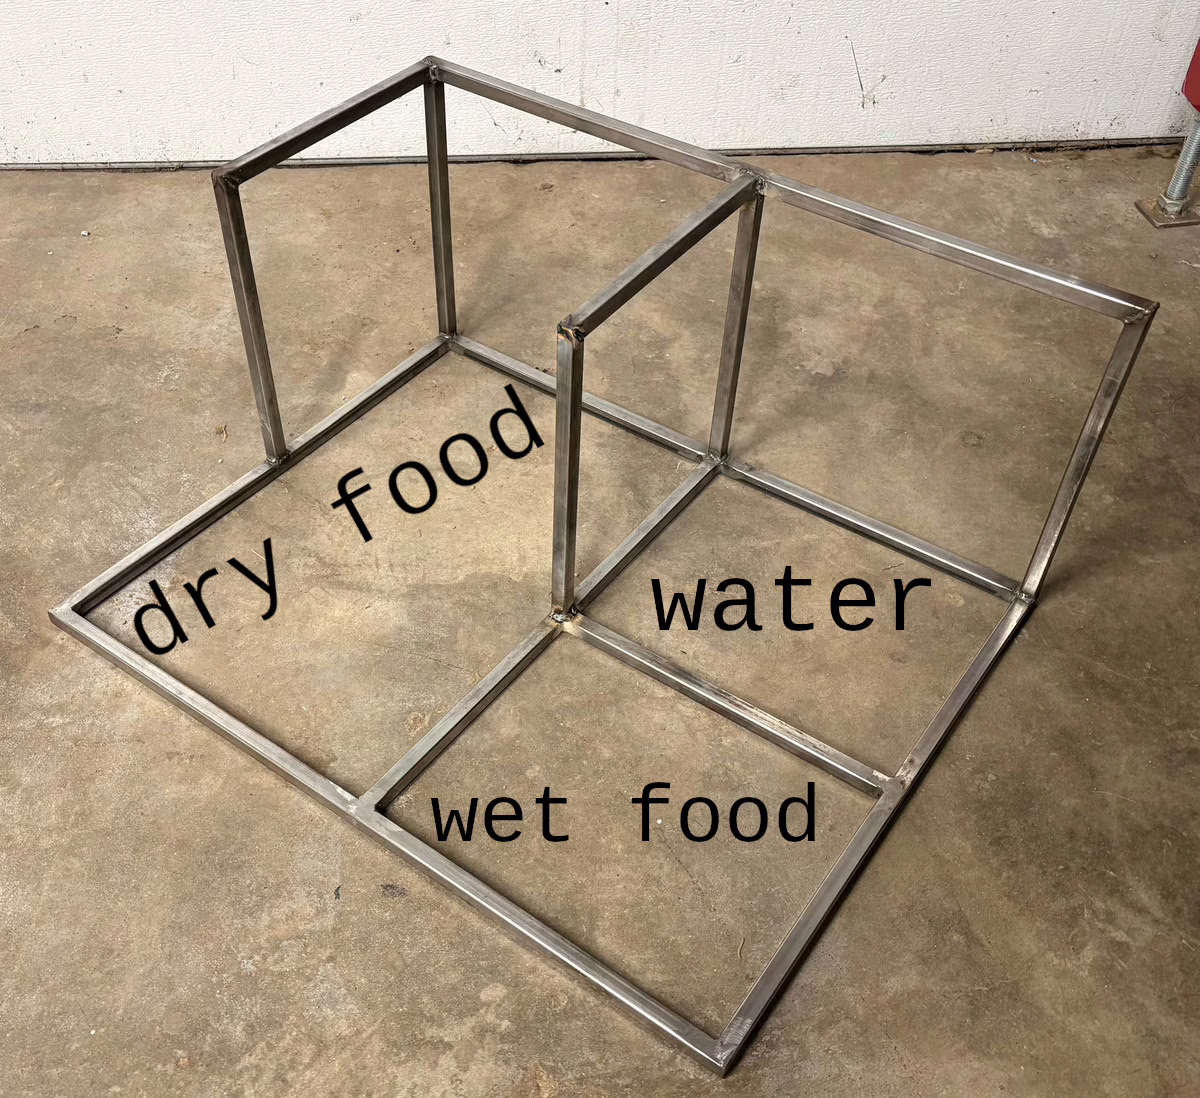
And the eventual locations of the station components:
Food, water, and food, what more do you need?
To be added to the frame are some tabs to mount the plywood against, the lip around the non-walled region, and the area that will house the battery. Right now I'm thinking to build the enclosure for the battery to the left of the dry food area.
battery mounting
The battery I've chosen for the task is the Voltaic Systems V50, mainly because of its compact size and pre-regulated output. Luckily the feeder and fountain run off standard USB (max 500mA), so they can be plugged directly in to the V50. Compared to using a UPS that has identical energy storage capacity, I should get a lot more runtime by avoiding the inefficient DC (UPS battery) -> AC (UPS inverter) -> DC (USB wart) conversion.
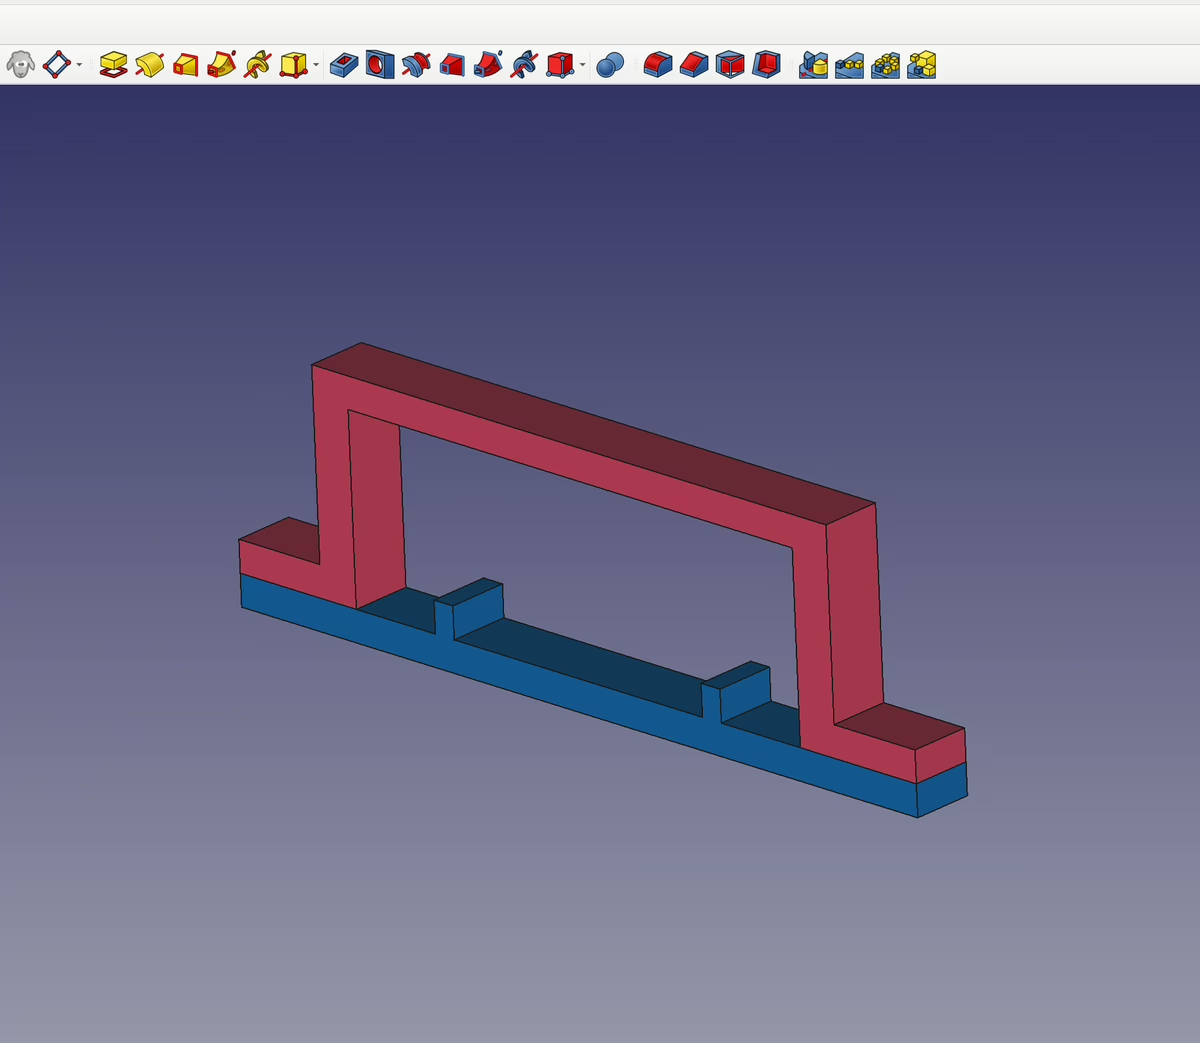
Since my intent is to mount the battery inside an enclosed box (to protect it from dust/spills/cat investigations/etc), active cooling is part of the plan. I made a bracket for the battery in FreeCAD with a standoff, to ensure that the bottom (which would otherwise be pressed flush to the wall of enclosure) had a gap for air to flow:
Two part bracket
Two of these will be used for each battery, supporting at both ends.
Now you might be wondering, how will this bracket interface with the battery and the enclosure? Are you gluing the bracket around the V50, and then gluing the whole thing to the wall?
Of course not. In this house we use screws.
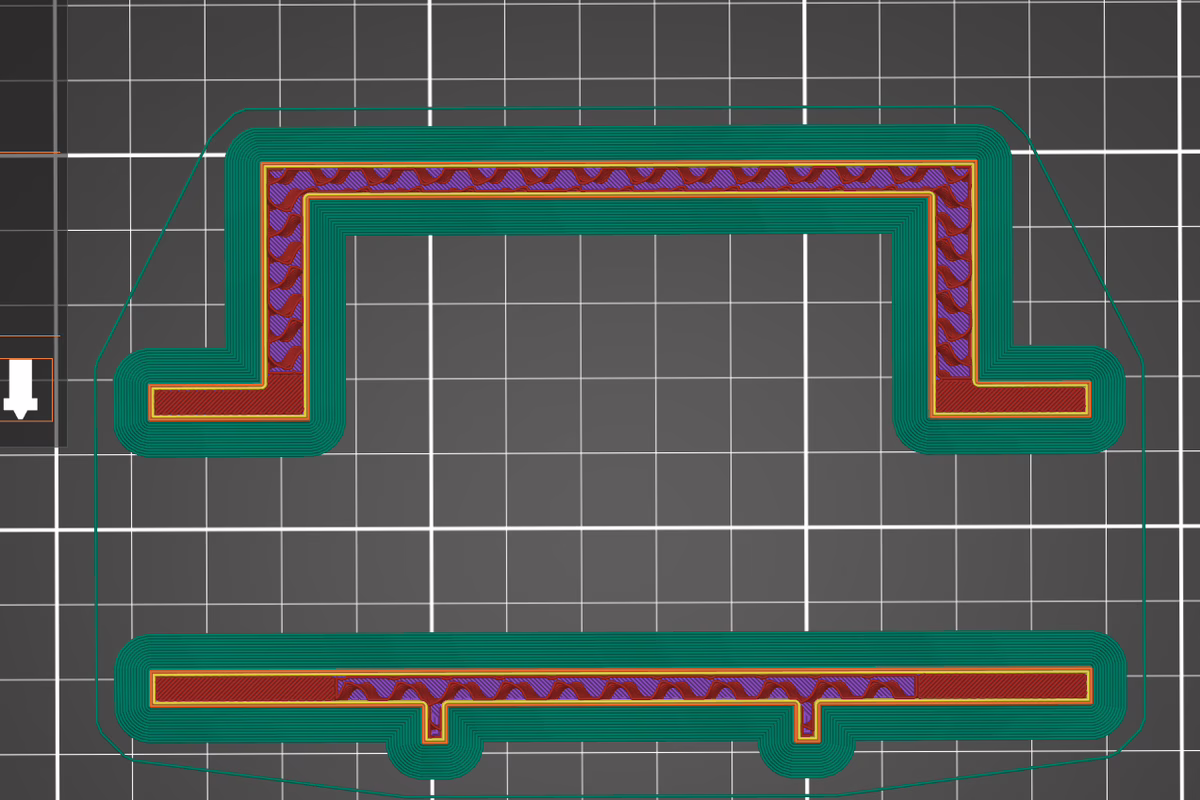
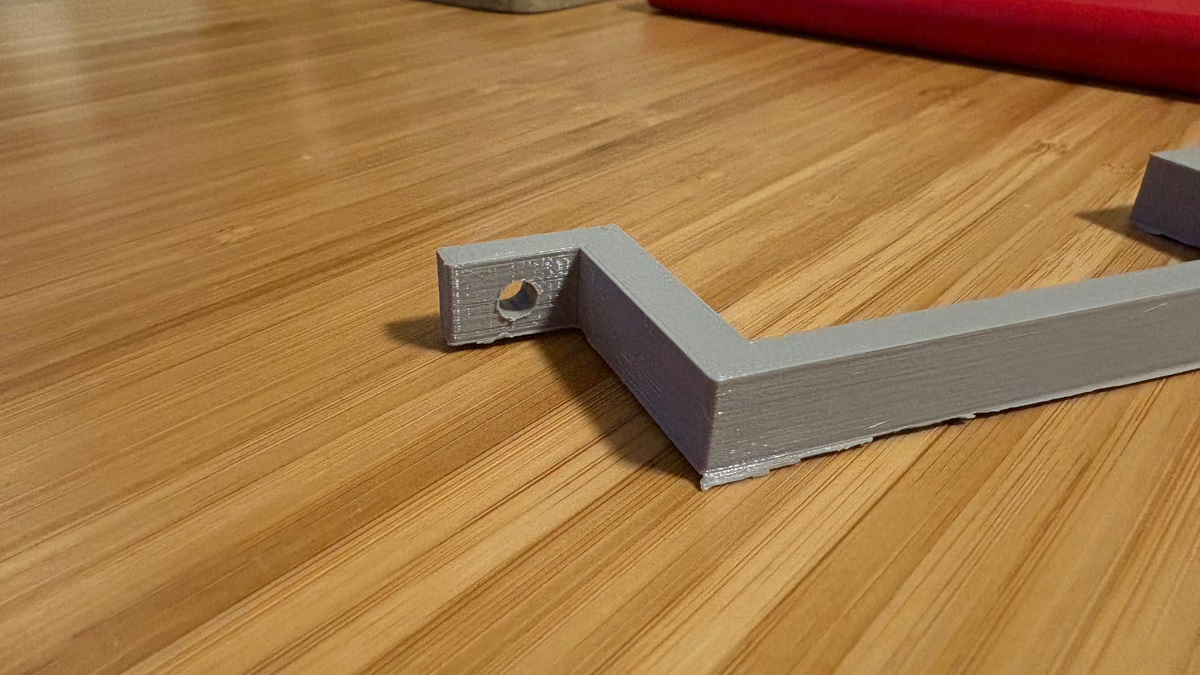
For simplicity of printing I decided not to model the clearance holes for the screws, and just make them myself with a drill. To do this I went with 100% infill in the relevant bits:
Part in slicer, look at that infill.
This is a trick I have used before, although previously I have not drilled perpendicular to the layers. This didn't seem to matter though:
Hole made by 11/64" bit running at 1 minute per revolution. Probably could've center punched all the way through.
Next in this series will be a discussion of the mechanism to retain the automated feeder - stay tuned!